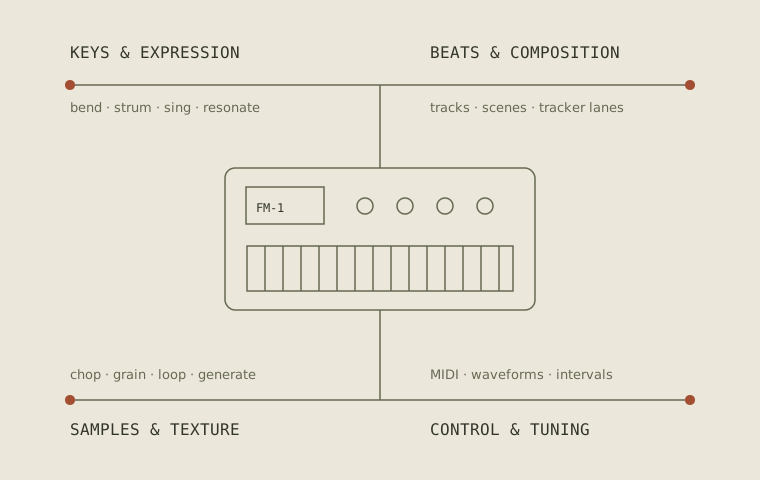
One box. Sixteen different directions.
Hold a bent note, chop a recording, strum a chord or leave a generative piece unfolding. These are sixteen firmware highlights chosen for different ways of making music. This is a selection by use, rather than a popularity ranking. Shared code is common; extra presets and cosmetic forks do not earn separate places.
Documentation and links checked 30 October 2026. These are researched selections; we have not flashed or played these firmwares on our own FM-1. Release details belong to their maintainers, and a simulator cannot establish a safe hardware update.
What you need before installing
- An FM-1 and a USB data cable. A charge-only cable will not carry MIDI. Use a reliable powered connection and keep it connected throughout a write.
- A desktop computer. Most linked updaters use Chrome or Edge over HTTPS and require permission for MIDI including SysEx. A browser emulator can often play without a device; that is different from updating one. OPN-1 and Shine On have documented command-line routes.
- A backup made with the firmware already installed. Export projects, patches and samples to files you can find again. A new firmware may share or overwrite the same flash area without understanding the old projects.
- The correct package and a return route. Read the current release and compatibility notes. Keep the official image and updater specified by the maintainer. Some restoration tools specifically expect V15; that does not mean V15 is the latest stock release. Official Open has a separate version series.
- A free MIDI port. Close the DAW, editor and other browser tabs using the FM-1 before running an updater. Reopen the editor after the instrument restarts.
A web editor changes sounds, samples or projects; an installer replaces the instrument software. Some projects combine them on one page. The buttons below distinguish those jobs. This guide links to maintainers' tools and never requests access to your MIDI devices.
M-VAVE downloads & M-UPGRADE ↗ · Official Open & Workbench ↗
If the update is refused or the instrument will not start
Stop and follow the instructions for the firmware that is actually installed. Safe-mode gestures, protected loaders and accepted package layouts differ. Do not apply a boot-button combination from another project's guide or disable an installer's compatibility check. Normal web installation often needs only USB; a failed boot can need the separate Transporter recovery route described by the maintainer.
Transporter recovery documentation ↗. Read it before relying on it; its platform and device requirements are separate from those of a browser installer.
16 firmware highlights
Clipper
Play an MPE synth
Hold a chord and bend just one note. Clipper gives each MPE note its own pitch, pressure and slide, alongside a deep patch editor. Its HYBRID engine combines three oscillators, two filters and a modulation matrix. This is the pick for expressive playing and sound design rather than arranging a song on the box.
Know before choosing: The maintainer reports it running on FM-1 hardware and passing computer tests, with work still outstanding. Its many engines count as one firmware here. It has no multitrack song mode or built-in samples.
What to install & how to get started
- Connect the FM-1 by USB. Back up with the editor, then close that tab before opening the installer in desktop Chrome or Edge.
- Allow MIDI/SysEx, select the FM-1 and use the current Clipper package offered by its installer. Wait for the completed update and restart.
- For MPE, open HOME held → SYSTEM → MPE. Match the member-channel bend range to the controller: master channel 1, note channels 2–16. Confirm one held note can bend while another stays still.
Primary documentation for this selection
LOOM-8
Arrange eight parts
Eight instrument tracks, scenes and a song: LOOM-8 is the portable arrangement option. Its weave function crosses patterns, while parameter locks and momentary effects turn a repeating sequence into a performance. Tracks can play synths, samples, sliced breaks or external MIDI instruments.
Know before choosing: Eight tracks share the hardware's resources; this is not eight independent desktop synths or an eight-track audio recorder. Factory sounds now occupy the sample bank. The installer checks available space before adding them.
What to install & how to get started
- Use LOOM-8's backup page first, then connect directly by a USB data cable and open its Install page in Chrome or Edge.
- Allow MIDI and follow Install. Read the sample-bank space prompt: the factory instruments need room alongside your samples. Add the optional factory breaks from the project's samples page if wanted.
- Leave the optional replacement bootloader unchecked unless you deliberately intend that separate change. After restarting, follow the manual's quick start and save a scene before assembling a song.
Primary documentation for this selection
FoMni-1
Strum a chord harp
The white keys become a strum plate and the black keys choose chords. Add bass and an Omnichord-inspired rhythm and the FM-1 becomes an accompaniment instrument you play with your hands, without first programming a pattern. A useful change of gesture for writing chord progressions.
Know before choosing: The strum plate is a mapping of the FM-1 keys, not a new continuous touch surface. The point is its playing layout and accompaniment, not another bank of synth patches.
What to install & how to get started
- Try the browser version to learn the chord buttons and strum layout. Save anything needed from your current firmware using that firmware's own backup tool.
- Connect the FM-1 over USB and open FoMni's installer in Chrome or Edge. Allow MIDI and follow Install; a ready-made firmware file is also available in Releases.
- After the restart, hold a black-key chord and sweep the white keys. PLAY starts the rhythm; learn the minor and seventh modifiers before adding accompaniment.
Primary documentation for this selection
FiMba-1
Shape a modelled kalimba
A metal tine on a resonating body gives you different decisions from an oscillator and filter. FiMba models the tine material, body, buzz and sound-hole effect, with a kalimba-style note layout and mbira patterns. Granular cloud, delay and reverb can extend the short pluck into a texture.
Know before choosing: A beta release; its author reports installation and playing on a real FM-1. The browser version runs the firmware's C sound code, but cannot establish how your physical unit will behave during an update.
What to install & how to get started
- Open the project page and try the model first. Keep a backup of the firmware data already on your FM-1.
- With the FM-1 on USB, use the page in Chrome or Edge, grant MIDI permission and select its Install FiMba-1 control. Use the matching release offered there.
- Let it restart, then compare metal, bamboo and glass with the effects reduced. The project page is both simulator and updater; building the source is optional.
Primary documentation for this selection
GRAN
Turn a short sample into grains
Load a fragment of your own recording and move through it with Classic, Loop or Cloud grain behaviour. GRAN concentrates on grain position, size, density and modulation, rather than chopping a song into drum pads. A tiny piece of a voice, bow or room sound is enough material to start.
Know before choosing: The maintainer specifies eight voices and an approximately 1.48-second playback buffer. This is short-sample synthesis, not storage for long field recordings. The project and manager are currently in Chinese.
What to install & how to get started
- Open FM-1 Manager in Chrome or Edge with the FM-1 on USB. Allow MIDI SysEx and choose the GRAN card; keep the cable connected throughout the write.
- After installation, open the separate GRAN sample manager. Close competing MIDI tabs/apps and select the instrument port, not a port called Sample Bank.
- Load and trim a WAV, AIFF, MP3 or FLAC. The manager converts it to 44.1 kHz, 16-bit mono and writes a sample slot. On the FM-1, open the SAMPLE list from HOME and use SEL to load it.
Primary documentation for this selection
PIGEON
Chop and sequence samples
Two song samples and a sixteen-pad drum kit make PIGEON the choice for assembling your own breaks, voices and found sounds. Set chop points, reverse individual fragments and build patterns into an arrangement. Its dedicated browser sample tool is part of the instrument, not an optional afterthought.
Know before choosing: The 0.5 beta shares 500 KiB of usable sample storage. The maintainer reports its hardware checklist complete. USB sampling is mono; live input monitoring and internal resampling are not implemented.
What to install & how to get started
- Read the website's current installation and cross-firmware guidance. Download a full backup before replacing firmware or samples.
- Use the dedicated USB MIDI installer in a supported desktop Web MIDI browser. Let it identify the device and follow its compatibility checks; use the linked transition guidance if it refuses the installed firmware.
- After restarting, use the sample tool to load two song sources and/or a kit, set chops and save. Storage is shared, so check free space before adding audio. The emulator starts empty and also needs samples.
Primary documentation for this selection
BEETLE
Write drums in a tracker
BEETLE puts composition into vertical lanes: notes and commands move down a tracker rather than around a piano roll. Its six-lane digital drum machine suits precise rhythmic edits and small pattern variations. Choose it for that way of writing, rather than expecting another general-purpose workstation.
Know before choosing: User samples and six-channel USB capture are explicitly experimental and not fully validated on physical FM-1 hardware. User samples require a separate Storage V2 migration; installing the firmware alone does not perform that migration.
What to install & how to get started
- Start with the simulator and read the release's storage/recovery notes. Back up projects and any separate global sample library.
- Connect by USB and open the project's WebInstaller in Chrome or Edge. Follow the detected-device and package checks without bypassing a rejection.
- Begin with the built-in drum sounds. Only undertake Storage V2 migration or multitrack USB capture after reading those separate experimental procedures and arranging a proven recovery route.
Primary documentation for this selection
AMB-1
Tend a generative piece
Breathing voices, bell loops of unequal lengths, bass and quiet percussion start as a self-playing piece. You choose a scale, remove or restore notes and let the layers drift. AMB-1 is useful for making an evolving bed to record against, with fewer decisions than programming a complete groovebox.
Know before choosing: Generative does not mean a finished composition arrives automatically. Its appeal is the changing relationship between a few layers; record the passages you want to keep.
What to install & how to get started
- Try a piece in the browser, then save your current FM-1 data before changing firmware.
- Connect the FM-1 by USB. Open the AMB-1 installer in Chrome or Edge, allow MIDI and follow Install. Its manual describes the controls and return-to-stock route.
- After restarting, choose a piece and scale. Bring layers in gradually and use freeze/rest to make an arrangement you can capture through the audio output.
Primary documentation for this selection
Tonitor
Layer free-time sound objects
Six tracks hold independently played and looped sound objects with no shared tempo grid. Tonitor's generated textures, resonators and evolving voices suit electroacoustic sketches and slow transformations. The large, high-contrast display is another reason to look at it if dense menus get in the way.
Know before choosing: The loops record played note gestures, not six incoming audio tapes. There is no drum kit, MIDI clock or song-pattern arrangement. Saving a Tonitor session can overwrite projects another firmware left in the shared user-data area.
What to install & how to get started
- Export anything wanted from the current firmware before installing or saving a Tonitor session. Read the manual's Installing section.
- Connect with a USB data cable and use the browser installer in desktop Chrome, Edge or Opera. Permit MIDI SysEx and follow detection, writing and verification.
- Record a short gesture on one track, then another at a different length. Use Tonitor's backup page for sessions. If capturing USB audio, select its stereo master or six mono tracks deliberately in the DAW.
Primary documentation for this selection
CTL-1
Control the rest of the setup
Four banks of knob controllers, scale/chord keys, an arpeggiator and Euclidean drums turn the FM-1 into a MIDI front end for software or other gear. Internal General MIDI sounds let you work without a computer connected. This changes the box's role in a setup, not just its timbre.
Know before choosing: Choose the correct build: the full CTL package includes Bluetooth MIDI; the ctl-usb package omits it. The physical TRS socket is an input, so plan outgoing connections around the documented USB/Bluetooth routes.
What to install & how to get started
- Save your existing data, connect over USB and open CTL-1's installer in Chrome or Edge.
- Follow Install and let it reboot. For a downloaded package, distinguish the Bluetooth-enabled and USB-only files rather than choosing by filename similarity.
- Open the manual, assign the receiving DAW or synth's MIDI channel, and map the four controller banks. Check that Local/internal sound and MIDI Thru settings suit the intended route.
Primary documentation for this selection
Speak37
Play words as notes
Each key speaks the next word or syllable at its pitch. Speak37 makes a sentence into a playable line, from a toy-like voice to a choir or robot. For music production, the useful trick is controlling speech rhythm and melody directly, then recording the phrase as an audio part.
Know before choosing: The project supports several keyboards. Its name comes from the SMK-37, but it also has an explicit FM-1 build. The linked demonstration covers the project across those keyboard families, rather than proving every FM-1 feature.
What to install & how to get started
- Read the FM-1 section of the project README and back up the current instrument. Open the maintainer's installer hub in Chrome or Edge.
- Connect the FM-1 by USB and choose Speak37 for the detected FM-1. If selecting a file yourself, it must be the speak37-fm1 package, not Pro, Elite or MKE-P37.
- Let it restart, choose a sentence and play it one word per key. Use the project's sentence controls to make your own phrase before recording it into a track.
Primary documentation for this selection
MONK-1
Perform a vowel lead
Where Speak37 plays language, MONK-1 plays the mouth shape. A monophonic formant voice slides between vowels, with key pressure routed to vowel, pitch or both. It is a compact way to write an animated vocal-like lead without loading speech samples.
Know before choosing: Twelve singing characters share a formant-synthesis idea; they are not twelve entries in this guide. The voice is monophonic and does not speak arbitrary text.
What to install & how to get started
- Try the browser voice and read the manual's playing and pressure controls. Back up data from the firmware currently installed.
- Connect the FM-1 by USB and open MONK-1's Install page in Chrome or Edge. Allow MIDI, follow the updater and wait for the restart.
- Choose a voice, play a held note and set pressure to move the vowel. Start with a restrained pitch route so expression changes do not obscure the melody.
Primary documentation for this selection
OPN-1
Build with Mega Drive chip voices
YM2612 FM and SN76489 PSG recreations give OPN-1 a specific console sound architecture. Its web app imports OPM patches or extracts instruments from VGM music, edits their operators and organises a playable library. The distinctive part is the chip-and-file workflow, rather than merely a preset called retro.
Know before choosing: The patch library starts empty. The current web app requires the matching 2.x firmware; the old 1.x app is kept separately. Use material you have permission to reuse when importing sounds or publishing recordings.
What to install & how to get started
- Download the project ZIP and the FM-1 .fwsc from its current Releases page. This project's documented install route uses Python 3; the web editor is not a substitute for that step.
- Close the editor and DAW. Install the mido and python-rtmidi dependencies as described in the README, then run tools/fm1_install.py with the exact downloaded package filename. Confirm the detected unit before accepting the script's write prompt.
- After the restart, open the matching web app, connect the FM-1 and fill the empty library from a permitted OPM bank or VGM source. Save/export your edited bank.
Primary documentation for this selection
ETCH
Draw and morph waveforms
Draw one waveform, shape another and morph between them while a third wave modulates the result. ETCH puts the shape of a cycle under the FM-1's own controls. It is an interesting sound-design direction when you want to construct the raw material rather than browse a large engine collection.
Know before choosing: Experimental installation candidate. The repository explicitly says software tests do not establish a successful hardware transition or recovery. Its overview and installation section cite different release numbers: check the actual package manifest and current installer together before proceeding.
What to install & how to get started
- Read the repository's Installation and recovery section, including its hardware-test limits. Arrange an independently tested recovery path and back up before considering a flash.
- Use the maintainer's WebInstaller in Chrome or Edge with a USB data cable. Check the running firmware, package version and protected-loader compatibility. A rejection is a reason to stop, not bypass validation.
- A legacy stock-header ETCH package still installs ETCH: it is not official stock restoration. If the required cross-firmware route is unproven for your device, keep this as a project to follow rather than install.
Primary documentation for this selection
FuMi-1
Explore shigin tuning and ornaments
FuMi reshapes the keyboard around the Suiko ST-50 poetry-accompaniment instrument: a dedicated note layout, koto ornaments, six-operator FM voices and a choice between equal temperament and the project's measured ST-50 tuning. The musical change is the interval system and phrasing under the fingers.
Know before choosing: This is an interpretation of a specific accompaniment instrument, not a generic world-music preset bank. The audition bench provides the project's comparison material; it does not turn an FM-1 into an acoustic koto.
What to install & how to get started
- Try the browser layout and audition bench. Read the current recovery instructions and retain the official image version that this project's restore route expects.
- Back up your current work. Connect by USB, open FuMi-1's Install page in Chrome or Edge and follow the updater with MIDI permission enabled.
- After restarting, compare equal temperament and SUIKO tuning on the same short phrase. Learn the black-key ornament switch and octave-button pitch gestures before using the looper.
Primary documentation for this selection
Shine On
Play a divide-down string ensemble
Phase-locked footages, register filters and a moving three-line ensemble effect reproduce the architecture of a seventies string machine. Shine On now puts four parts through that system. Choose it for sustained ensemble playing and register blends, where shared filtering and chorus movement matter as much as a note's attack.
Know before choosing: Four parts share sixteen keyers and the processor. The maintainer advises watching CPU time with dense sounds. There is no working standalone project website linked here; the repository supplies the package and the documented build/install route.
What to install & how to get started
- Read the repository and use its current released FM-1 package if available. The documented source-build route needs Linux x86-64, Python/Pillow, the JieLi toolchain and the specified AC79 SDK files through Dinghy.
- For that documented route, build the package and use the project's tools/fm1_install.py over USB. The browser simulator also requires a local build; it is not a verified one-click hosted editor.
- Back up first and follow the project's current compatibility/recovery guidance. Once installed, start with one part, balance the registers and ensemble, then add parts while monitoring the GLOBAL CPU-time display.
Primary documentation for this selection
No selections match. Clear the search or choose All.
Two maintainer-linked demonstrations.
FoMni shows a chord-harp layout; Speak37 shows pitched speech. These films also appear in the Watch room. The other selections link to simulators or audio where the project provides them; no unrelated film stands in for a missing demo.
FoMni-1 - Omnichord inspired firmware for FM-1
The maintainer-linked demonstration of FoMni’s Omnichord-inspired chord buttons, strum layout and accompaniment on the FM-1.
Try the browser simulator first: hold one chord and change the speed and direction of the strum.
Speak37 firmware for SMK37 and FM1 keyboards of M-VAVE
The maintainer-linked Speak37 demonstration: words become pitched phrases. This project supports both SMK-37 variants and a separate FM-1 package; choose the build for your actual device.
In the simulator, play one sentence slowly and then rhythmically. Keep the words constant and change only the notes.
Where to begin
For an expressive controller, start by reading Clipper's MPE setup. For a self-contained arrangement, compare LOOM-8's scenes with PIGEON's sample workflow. For an immediate change in playing technique, try FoMni or FiMba in the browser. Keep ETCH on a separate experimental list until its hardware-update questions are resolved for your unit.
Felucca remains an important foundation for much of this work, with its own installer, editor and source documentation. We have not counted its individual engines or a series of close forks as extra highlights.